A Sewing Blog Featuring Projects For Your Home & Your Littles, Welcome!

Some Fabric We Stitch, Some We Stash. When We Sew...All DIVA. Welcome To My Sewing Blog: StitchStashDiva!
Have a look around my blog for fun project ideas and tutorials, then visit my FABRIC SHOP on Etsy and say hello!

Monday, January 9, 2012

Receiving Blanket & Burp Cloth TUTORIAL

Have you noticed all of the babies being born lately!?!  When I was a new mom I went through SO many receiving blankets, every single day!  My daughter was a bit of a barfer (hi sweetie!) so I preferred to use receiving blankets as burp cloths, and I used my burp cloths as "liners" on my changing table.  One of my favorite gifts to make for new babies is this Receiving Blanket & Burp Cloth Set. 
Receiving Blanket & Two Burp Cloths TUTORIAL:
Step 1:  Pre-Wash & Dry TWO Yards of High Quality Cotton Flannel.  I prefer to use two different/coordinating prints, as you will see in the following pictures.  Iron.  Cut each yard of fabric, right-side up, into three pieces.  For the Blanket: 25.5" x 31.5" and for the Burp Cloths cut two:  16.5" x 12.5"
 Tip:  When working with patterns always cut RIGHT-SIDE UP so you can follow patterns exactly.  For this set I chose to cut between dots so that when sewn, the half dot edge forms a really cool look, like binding without having to add binding, love it!  
 Step 2:  Place both Receiving Blanket pieces right-sides together.  Place fabric for both Burp Cloths right-sides together.  PIN!
 Tip:  The better you cut and the better you pin the better your finished product will look.  I get very impatient and excited and want to rush and skip steps, but cutting and pinning are two things I have learned (the hard way, ahem) to take great pride in details.
 Step 3:  Sew 1/4" seams around all four sides leaving a small opening, enough space to turn the piece right-sides out.  Back Stitch at both sides of the opening - this will prevent ripped stitches when turning right-sides out.
 Step 4:  Snip all four corners.
 A close up of clipped corners.
 Step 5:  Turn each piece right-sides out.  Iron.
 Step 6:  Top-Stitch 1/4" around all four sides.  I also sew a second stitch, at the opening, as close to the edge as possible.  This second stitch is not required, but I like to make baby items as sturdy as possible knowing it will be washed often!
 Voila!  A Receiving Blanket & Burp Cloths Set
 I like to fold all three pieces up and wrap them with a lovely piece of organza ribbon, presentation! 
 Certain to be a well-loved (and well used!) gift!
I have been a HUGE fan of Robert Kaufman's Cozy Cotton Flannels for as many years as I have been sewing flannel!  Even though my daughter is now a toddler, I still use the burp cloths I made her for many purposes, and they still look as wonderful as they did 2 years ago!  Quality is everything!  

I sell several different Cozy Cotton Flannels in my shop and I HIGHLY recommend purchasing some for your stash, if you haven't already!  When you are in the mood to sew and then actually find the time to sew, nothing is better than having a well-stocked stash waiting for you!  Summer is a challenging time to find a good selection of quality flannel so please have a look through my shop and stock up today!  Here are a few pictures of my current inventory:


www.StitchStashDiva.etsy.com


Monday, January 2, 2012

Place Mat & Napkin Tutorial

Place Mats & Napkins really dress up your table, and in my opinion, make food taste better!  Whether you are making a fancy romantic dinner, eating dinner at home night after night, or entertaining friends and extended family, adding these luxurious place mats to your table adds a touch of love and sophistication to every meal.  

I have two requirements for place mats and napkins:  1) they MUST wash well, and 2) they must be fun to make = quick.  There are many options for making your own place mats, many patterns, many tutorials.  In researching this project I have made many different versions and what I love most about my pattern is the luxurious, quilt-quality of the final product.

The following tutorial will yield 2 Place Mats & 4 Napkins.  Napkins are always washed more frequently than the place mats, so the additional napkins will provide you additional days of use between laundry days.  Another bonus to this tutorial!

THE MOST IMPORTANT STEP of this entire project is to PRE-WASH & SHRINK YOUR FABRIC.  I know I put that in all caps, just making a point!  The only thing I dislike more than laundry is ironing, can you relate!?!  Although we usually pre-wash high quality quilt fabric in cold water and tumble dry on low, we want to pre-wash for this project on warm/warm and dry on hot.  Yes, on HOT!  While developing this pattern I made several place mats without pre-shrinking my fabric and as a result I have to iron after every wash.  *Sigh*

For this project you will need:
- 2 Yards of High Quality Cotton Quilt Fabric (I prefer two coordinating fabrics)
- 2 - 20" x 14.5" Pieces of Low-Loft Batting (I like Warm & Natural)
- Matching Thread, a Sewing Machine, and Scissors

A Rotary Mat, Quilt Ruler & Rotary Cutter will improve your cutting accuracy and finished product.  This is a great time of year to purchase these supplies at big-box fabric and craft stores such as JoAnns.

Place Mat Tutorial:
Step 1:  Pre-Wash and Shrink your fabric.  Do not wash batting, fabric only
Step 2:  Iron Fabric
Step 3:  Cut each yard of fabric into (2) 20" x 14.5" to make one place mat and (2) 20" x 20" to make two napkins. 
Step 4:  To make each place mat, sandwich your fabric and batting:  fabric right-sides together, then lay the batting on top (or under as in this picture).  Pin, Pin, PIN!!!
  Step 5:  Sew 1/4" seams around the edge. leaving a 4-5" opening for turning your place mat right-side out.  After sewing, trim any uneven edges or excess fabric.  You will have the best results with equal 1/4" seams.
Step 6:  Before turning ride-side out, clip all four corners as shown below.  Clip as close to the seam as possible, without clipping your stitches.
 Step 7:  Turn your place mat right-side out.  Use your finger or the eraser end of a pencil to push each corner all the way out.
 Step 8:  IRON!  I start with a corner and carefully pull the fabric so the seam is exactly centered.  After ironing all around the edges, be certain to iron the entire place mat well.  This is a crucial step to prepare for top-stitching, and the overall washable feature of this pattern.
 Step 9:  Top-Stitch a 1/4" around the entire place mat. 
 Step 10:  Machine stitch or hand sew the opening used for turning the place mat ride-side out.  I have done both and since I am lazy time conscious I prefer to machine stitch, as close to the edge as possible.  For the sake of this tutorial and "doing things right, ahem" I hand stitched the opening closed with needle and thread.  You will seal the opening when you top-stitch around the edges, however I much prefer a completely finished product and highly recommend this last step.

Napkin Tutorial:
Step 1:  Fold over each edge 1/4" and iron. 
Step 2:  Repeat (Step 1) Important Note:  I have made many napkins with this boxed corner and many with perfectly mitered corners.  Boxed corners are better suited for heavy washing and MUCH faster.  Save the fancy mitered corners for your next quilt binding, enjoy simplicity now.
Step 3:  Sew as close to the edge as possible, or as you are comfortable with.
Step 4:  Iron.  After ironing, fold into your preferred style.  Voila, finished!
 I like reversible Place Mats & Contrasting Napkins!
 Another Option
 Pattern On Pattern
 Blue On Blue
 Love, Love, LOVE!!!
 The Two Fabrics Featured - STITCH by Betz White
 What time is dinner!?!
So there you have it, Place Mats & Napkins!  As needed, wash on cold and tumble dry on low.  When I pull my napkins and place mats out of the dryer right away I smooth them out on my folding table and they are good-to-go, no ironing needed!  You may choose to iron yours for added "crispness" after each washing, but I have been very happy with mine without ironing, all about your personal preference!
Please leave comments below or e-mail directly if you have any questions or suggestions.  My direct e-mail address is:  StitchStashDiva (at) yahoo (dot) com.

Happy Sewing!!!


Wednesday, December 28, 2011

The Colorful Art of Procrastination

I've had a stomach bug the past few days so my house is a complete disaster!  My 2 year old has literally pulled every.single.toy out and they are all currently crashed in a massive pile of mess.  Good Times!  I desperately needed to suck it up and work on the mountain of laundry and putting toys away, but since that didn't sound like any fun, I made corker hair bows, ALL.DAY.LONG!!!

The Art of Procrastination - Love It!!!
Voila!
I love all hair bows and have spent big bucks buying them for the past two years so I decided it was time to learn how to make them!  Cute little girls with colorful hair bows = CUTENESS!!!  Maybe it is because I have SO many Gymboree corker bows or because it is different than what I had growing up, I love corker hair bows the most!!!

I ordered all of my ribbon a couple weeks ago through several fabulous Etsy shops, and I watched the most amazing free tutorial on corker bows, I was very excited to get started.  First of all, don't drink the same naive Kool-Aid I did, it takes SO long to wrap all of the 1/4" dowels, SO long!  I baked ribbon all morning and afternoon long!  Then there is the business of cutting long corker strips into 3" pieces.  Again, very time consuming!

After all of my ribbon was wrapped, baked, cut and sorted, I started the assembly process.  This was the best part of all!  Don't get me wrong, although I'm complaining letting you know this project takes a chunk of time, each step is SO MUCH FUN!  

I intentionally made color palette bows so they will work with many outfits, I highly recommend this.  Although I made a lot of corker hair bows today, I already placed an additional ribbon order so I can make coordinating bows for ALL of my daughter's outfits.  Why have a few when you can have a LOT, right!?!

Pinks & Browns
 Oranges & Yellows
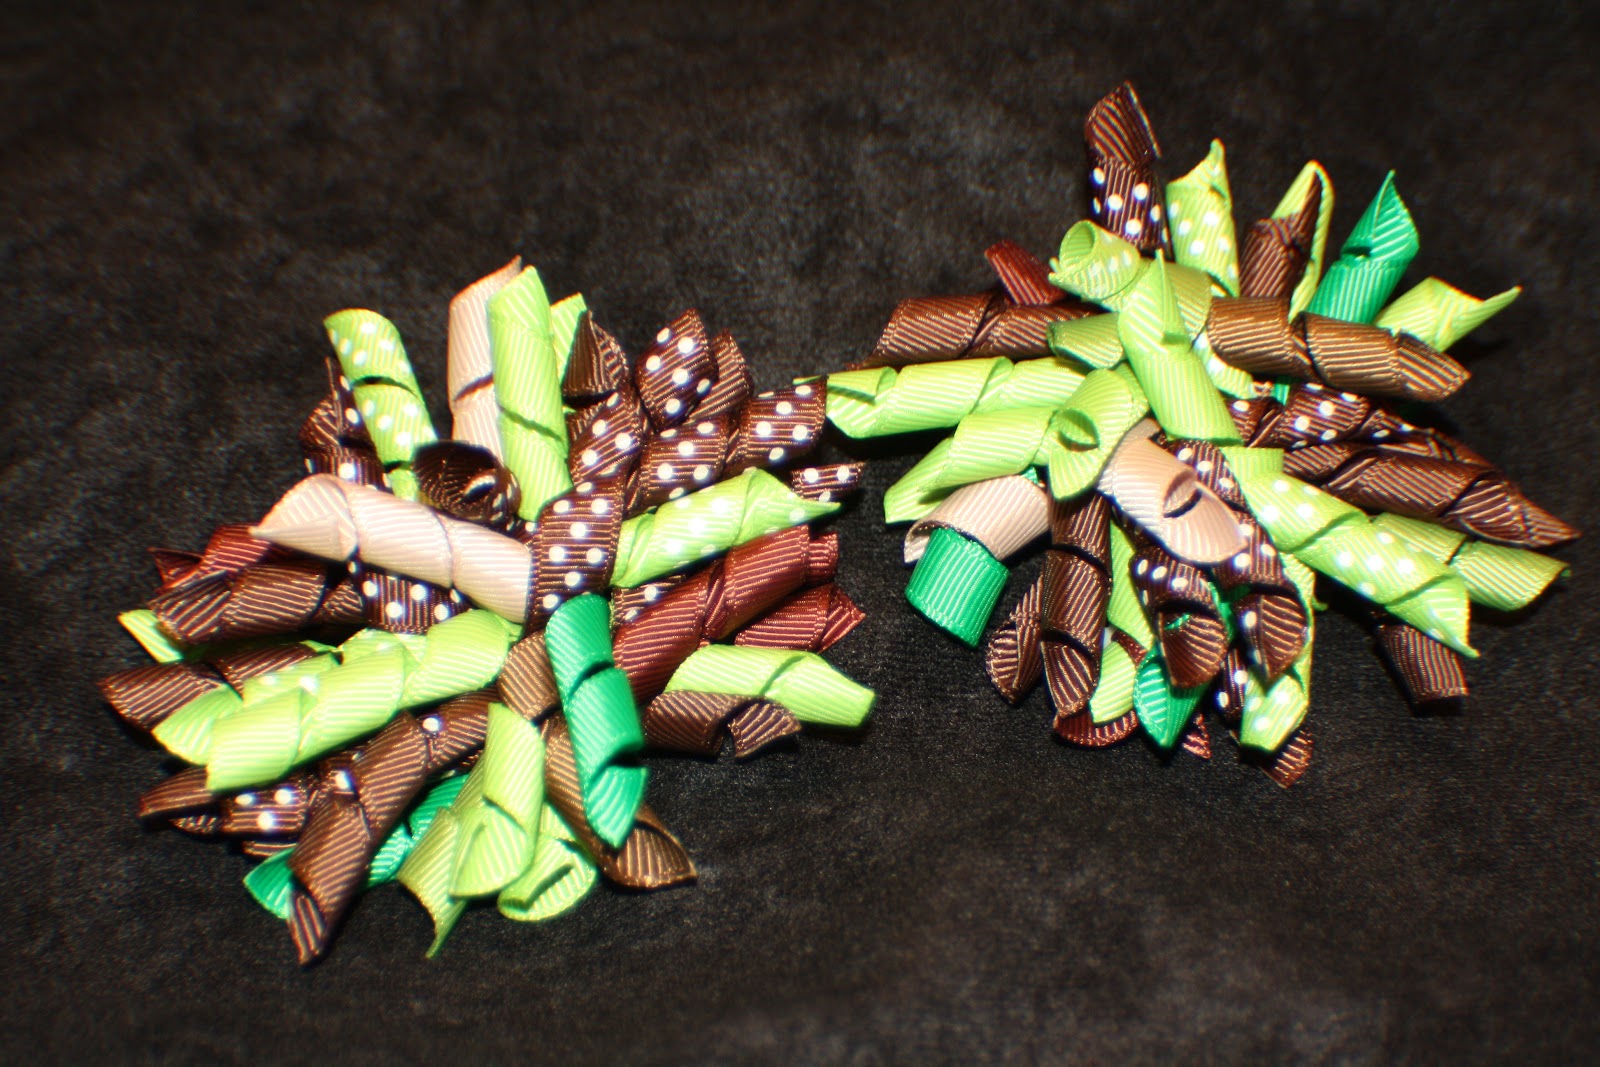
 Greens & Browns
 BLUES!!!
 Shades of Purples
 Blues & Greens
 Pinks & Oranges
 This shows the clip - each is sewn on, very easy!!!
 I Love My Pile of Procrastination Color!!!
I'm almost finished with a few fun, FREE SEWING TUTORIALS that will be posted in the next week!!!  Thanks for stopping by - please visit again soon!  

Happy Crafting!

Sunday, December 25, 2011

My Facelift - Do I Look Younger!?!

OK, so " I " didn't have a face lift, my blog did.  What do you think!?!  I'm still very involved in the playing stage, playing with color and layout.  I would LOVE your feedback - please have a look around this blog and leave feedback, private message me (StitchStashDiva@yahoo.com), or Facebook message me.  I will send you a 10% Off code valid for two weeks as a special thank you!  The deadline for Feedback to receive your 10% Off code is December 31, 2011, however feedback is always welcome!  Thank you!

If you have general feedback, fabulous!  If not, please comment on any of the following questions that spark a response.  

Do you like the layout?
Is my blog easy to read?
I know I am lacking pictures on posts, but what else would you like more of?
Do you like my color choices?  If not, what colors do you prefer?
Other?  When you read my blog do you want to visit again soon?  If not, why?

I will e-mail you your 10% OFF coupon code after I receive your feedback.  You may leave feedback on this blog with your preferred e-mail address and I will delete your personal information before publishing, or you may comment "please do not publish."  I want your feedback, I don't need "numbers" here so whatever is easiest for you!

You can message me directly:  StitchStashDiva@yahoo.com

You can contact me through Facebook.

THANK YOU!!!  I have shipments from Robert Kaufman & MICHAEL MILLER arriving later this week...this is a great week for a discount code, just sayin'!

Saturday, December 3, 2011

Hello!

Time flies!  No excuses, only because there are too many fabulous ones to share, so this post is to let you all know I'm still alive and breathing, and getting ready to invest some serious time and energy into this blog starting in January.

Pictures and FREE projects soon!  

All the best,

Tayva - StitchStashDiva

Wednesday, September 21, 2011

Halloween Gifting Kits

I just put together 3 "Fall/Halloween Gifting Kits" and will have them listed in my shop tomorrow morning!  Included in each kit are the following:
-3 Cookie-Mix Jar Gifts
-4 Cake-In-A-Jar Gifts
-Fabric & Materials to make 4 Potholder Gifts (2 per gift, 8 Potholders Total)
=11 Holiday Gifts Total (for about $3 each!)

Why Halloween Gifts!?!  There are so many times we want to give an appreciation gift, a teacher gift, or a hostess gift, yet it starts to feel like we keep exchanging the same bottle of wine with our friends or we are roaming the aisles of the grocery store trying to pick up a quick candle that "looks nice enough" to gift.  Tell me it isn't just me!!!

By planning ahead you are able to save money (YAY) and give thoughtful, fun gifts to the special people in your life.  Would you run to the store to buy a little thank you gift for the parent who covered your carpool obligations?  Would you run to the store to buy your child's teacher a little thank you gift for having extra patience with you child on a rough day?  Would you run to the store to buy your child's violin or gymnastics teacher a gift?  The answer, probably not!  But, wouldn't you like to be able to give them a totally unexpected yet thoughtful gift!?!

Before my family moved to Utah this past December I was a private violin teacher.  I never expected any gifts for holidays, I was getting paid, yet some families always did the "extra" little things that made me feel so special and appreciated.  Gift cards are always lovely, but I received so many fun gifts, specifically a lot of cookie mixes in a jar, and I absolutely loved putting them in my pantry!  When company came over with really short notice I was able to pull an adorable jar of delicious treats out, add butter and eggs, and voila, domestic goddess!  ;-)  OK, probably not so domestic or goddess, but you get my point! 

I have always enjoyed having holiday hot pads - it is such a small thing but it always puts me in such a happy mood when I bake.  This kit comes with the fabric and batting to make 8 hot pads, and I usually tie two together with ribbon to take as a little hostess gift when we go to dinner at a friend's house.  You never have to worry about food allergies or home decor, hot pads go in a drawer so it doesn't matter a bit if it "coordinates" at all, and they are fun!  I also love having them made up and ready to go so that it saves me the quick trip to the store to "buy another candle" or bottle of wine.  Don't get me wrong, I love wine and candles, but with a little bit of planning you can gift something thoughtful and unique, love it!!!

Trying to take pictures without natural light is so frustrating, so here is a sneak peek, and tomorrow I will take "good" pictures!  Enjoy!!!
 I'm also making Christmas Gifting Kits too!!!
More soon!!!

Monday, September 19, 2011

More Toddler Dresses!

My 2 year old is little miss smiley...when she wants to be!  Today has been such a great day, but busy, and my eager-to-smile baby girl was serving up a big side of grumpy as soon as I had her dressed and ready to take pictures this afternoon.  I will try again tomorrow!  Until then, here is one of my latest dresses featuring Michael Miller & Robert Kaufman fabric, love, Love, LOVE it!!!
 Back View
 Ready for Fall/Winter
 Cuteness!
I have SO many other patterns and projects lined up, now I am just needing more time to sew!  I have been having so much fun with these little Kimono-Style dresses that I have made them for almost all of my nieces, one more to go, and I am filling my daughter's closet!  

My favorite feature of these dresses is the reversible option, it is two dresses for one!  It seems like I never have a spare outfit when we are out and I need one so reversing my daughter's dresses has become more of a habit/pattern than I should admit to!  ;-)  

Now that fall is finally arriving I am starting to buy tights, leggings, and sweaters for layering.  We always take at least one "warm" vacation every winter and I love that my baby girl can be layered and bundled leaving home, then with a couple of outfit modifications, be ready for the beach and warm weather when we get off the plane, all without having to pack extra clothes! 

In another week I will have my holiday dresses online!  It is so much fun dressing up little girls for holiday parties and visits to meet Santa, but one month a year isn't much opportunity to get full value out of a holiday dress.  Don't get me wrong, still totally worth it!  Still, I have a few designs that are a holiday dress with an all-season reversible option.  Value!!!  Please keep checking my shop!!!

I have a FACEBOOK GIVEAWAY contest going right now - please LIKE my Facebook page and leave comments to earn additional entries.  I'm giving away a Halloween Fat Quarter Bundle - 8 Fat Quarters and FREE SHIPPING.  Good luck to each of you!  Please click here to visit my Facebook page and click here to visit my Etsy Shop!

Good Luck!!!